Windows
Windows has many different compilers at its disposal. Some offer native support to building against the Windows runtime while others will emulate a UNIX (the predecessor to Linux and BSD) environment to aid in porting software built for UNIX-like systems. As the specifics can get confusing, this book will only cover the installation of Window’s native compiler toolchain MSVC.
MSVC Installation
The Microsoft Visual C++ (MSVC) compiler is Microsoft’s official toolchain for building
software natively on Windows. It is installed with the Visual Studio Integrated Developer
Environment (IDE). MSVC (and the whole Visual Studio suite) can be obtained from
Microsoft’s official download page. Make sure
to select the correct edition (community being the free version) and click ‘Download’.
This will download the setup program VisualStudioSetup.exe, which is used to install
and configure Visual Studio Installer (VSI). The VSI allows you to select which tools and
technologies from the Visual Studio suite you want to install. Once you have installed
the VSI, start the program and you should be presented with some default tool
configurations (workflows). For developing with C++ you will need to select the ‘Desktop
development with C++’ workflow. You will also want to tick a few optional features as
well (found in the side bar).
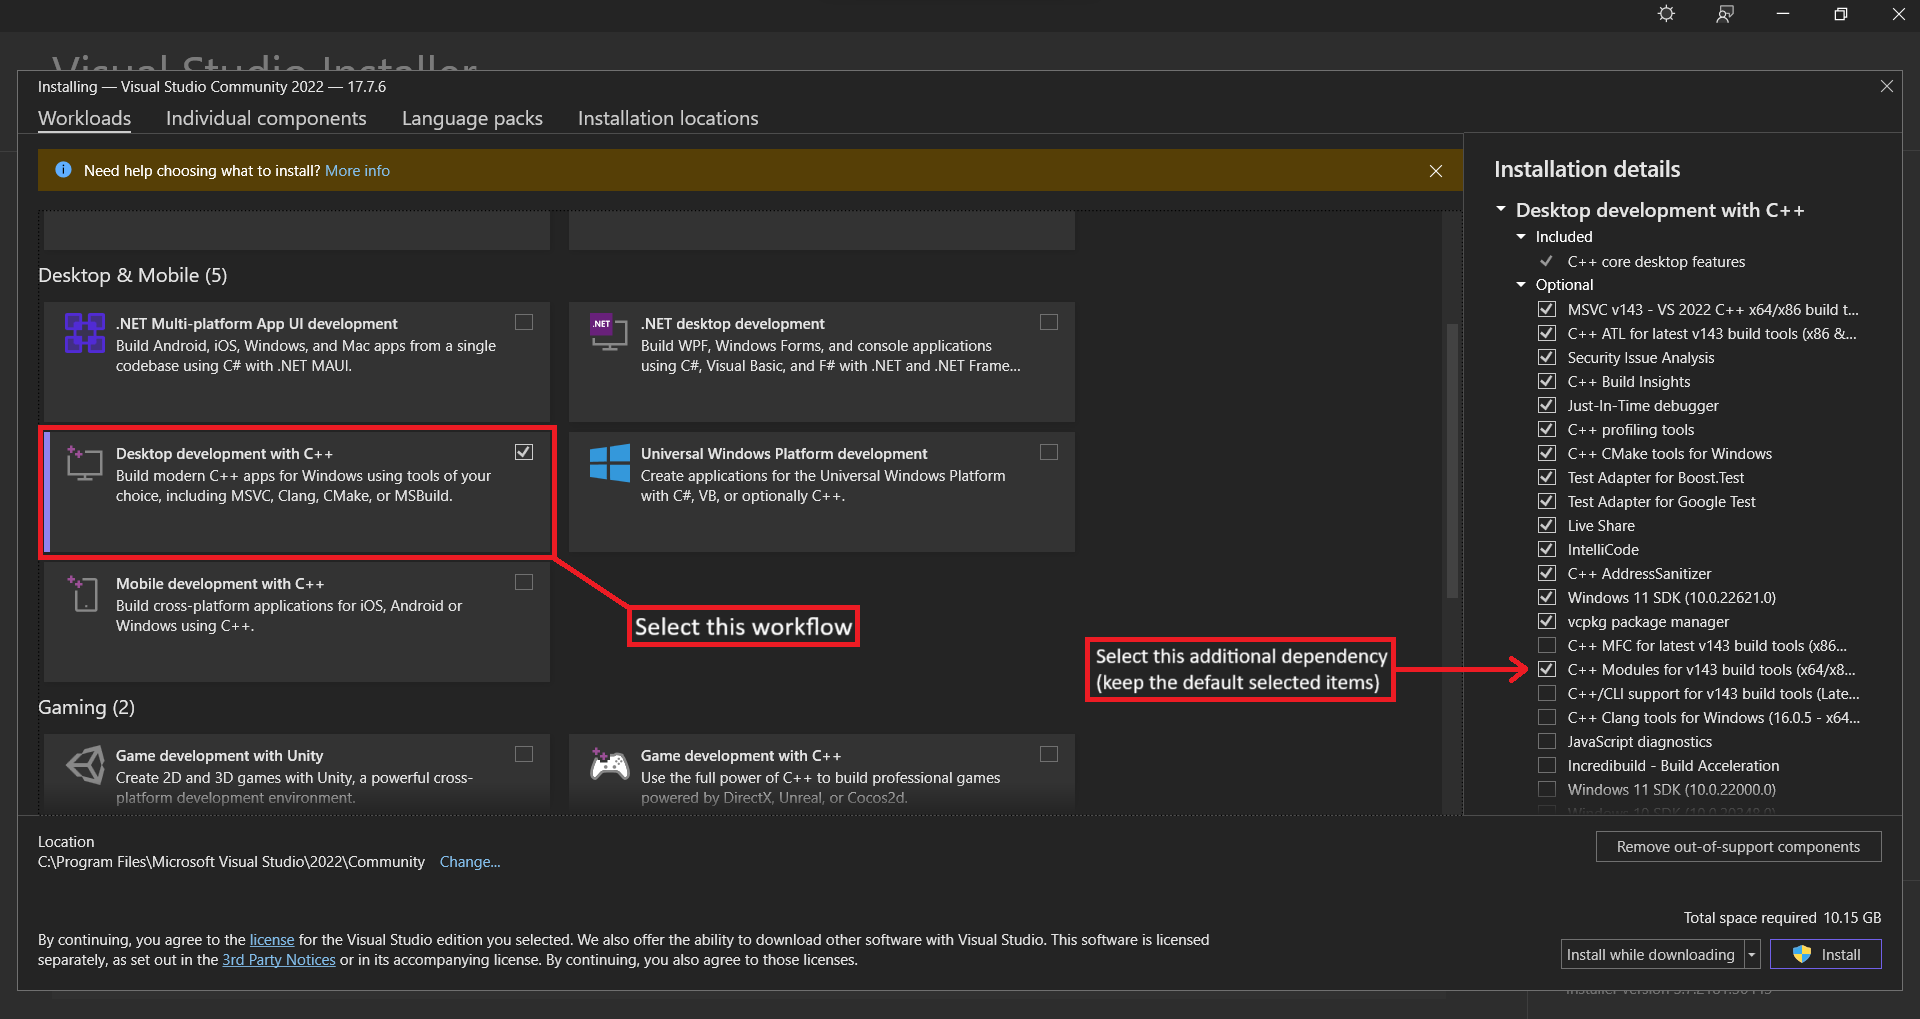
Finally, click the ‘Install’ button in the bottom right of the window to start the installation.
Verifying MSVC Installation
To verify you installed Visual Studio correctly you can open the newly installed ‘Developer Command Prompt for VS’. This prompt is needed in order to load the MSVC tooling into the prompt as it is not including by default in CMD or PowerShell. Simply run the following command to verify the install of the compiler.
> cl
Microsoft (R) C/C++ Optimizing Compiler Version 19.37.32822 for x86
Copyright (C) Microsoft Corporation.  All rights reserved.

usage: cl [ option... ] filename... [ /link linkoption... ]
Note
Any details displayed from verifying a given newly installed tool may differ to what is displayed in this book.
Tip
Alternatively you can follow Microsoft’s tutorial for creating a new C++ VS Project. This will be more convenient than opening a ‘Developer Command Prompt’ every time you want to compile a program and having to run the
clcommand manually but it takes more work setting compiler flags etc. for simple projects.
CMake is a build tool for C++ projects. It is used to manage different configurations for a projects. You can download the latest release from CMake’s Release Page (scroll down to ‘Latest Release’ not ‘Release Candidate’). You can verify it was installed correctly by opening CMD and running.
> cmake --version
cmake version 3.25.1

CMake suite maintained and supported by Kitware (kitware.com/cmake).
Installing Git
We will also need to install Git in order to install a particular package later. Git can
be installed by going to the ‘Git for Windows’ installation
page and selecting the correct version (eg. x64 for 64-bit systems) and following the
installation Wizard. Be sure to select the option for adding Git to the PATH.